Wood Rot Repair: Restoring the Integrity of Your Wood Structures
Are you dealing with wood rot issues in your home? Don’t worry; we’ve got you covered. Wood rot can be a frustrating and costly problem that can weaken the structural integrity of your property if left untreated. This article will provide valuable insights on fixing wood rot and effectively preventing further damage. Firstly, it’s essential to identify the source of the wood rot. Typically, wood rot is caused by excess moisture, so it’s crucial to address any leaks or areas of water infiltration contributing to the problem. Once the source of the moisture is identified and fixed, you can proceed with repairing the damaged wood.
One standard method of fixing wood rot is to replace the affected areas with new, healthy wood. This process involves cutting out the rotten sections of timber, treating the surrounding areas with a wood preservative to prevent future rot, and then installing new lumber to restore the structural integrity of the area. It’s essential to ensure the new wood is properly treated and sealed to protect it from future moisture damage.
In addition to restoring existing wood rot, it’s essential to take steps to prevent future issues from occurring. This can include regularly inspecting your property for signs of water damage, maintaining proper ventilation in areas prone to moisture buildup, and sealing any gaps or cracks that could allow water to seep in. Treating your wood with a protective sealant is also an excellent idea to help prevent rot and decay.
Suppose you’re dealing with extensive wood rot or unsure how to fix the damage effectively. In that case, it may be best to consult a professional contractor with experience dealing with wood rot issues. They can assess the extent of the damage, provide guidance on the best course of action, and ensure that the repairs are done correctly to prevent further damage.
By taking proactive steps to address wood rot issues in your home, you can protect the structural integrity of your property and prevent costly restoration down the road. Don’t wait until the problem becomes more severe – take action to fix and avoid wood rot in your home.
Understanding Wood Rot: Causes and Signs
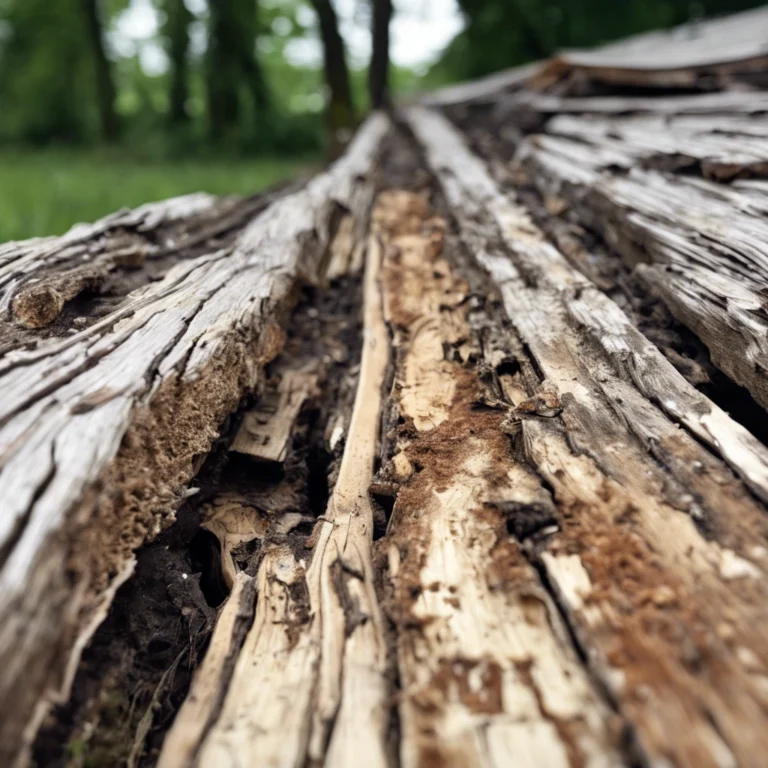
Understanding Wood Rot: Causes and Signs Wood rot is a common issue for homeowners, especially in exterior areas such as siding, window sills, and frames. The rotten wood can result from damp or moisture exposure, leading to dry rot and potential structural damage. Identifying the signs of wood rot, such as a darkening of the wood or a spongy texture, is essential. When it comes to repairing the wood, there are several options depending on the depth and complexity of the damage. Sometimes, wood can be repaired using bondo or fillers to preserve as much solid wood as possible.
When restoring rotted wood, removing as much of the rotten wood as possible using tools such as a putty knife or a five-in-one tool is essential. For dry rot, a two-part repair of a terrible wood system may be necessary to replace the damaged area. In some cases, the damaged wood may need to be replaced entirely with new wood to ensure the home’s structural integrity. Homeowners may choose to fix or replace the wood themselves or hire a professional for assistance, depending on the extent of the damage and their DIY skills.
Importance of Addressing Wood Rot Promptly
The importance of addressing wood rot promptly cannot be overstated. When left unchecked, wood rot can spread quickly and compromise the structural integrity of your home. This can result in costly repairs and potentially pose a safety hazard. It is paramount to address any signs of wood rot as soon as they are noticed. One way to repair rotten wood is to use a consolidant to strengthen the affected area. First, clean the wood area with a paint scraper or sanding block to remove any loose debris. Then, use a chip brush to apply the consolidant generously. Let it dry completely before moving on to the next step.
Next, you will need to fill any cracks or chips in the wood with a wood filler to the size and shape of the damaged area. Mix the filler in a clean plastic container according to the manufacturer’s instructions. Use a putty knife to press the filler into the damaged area, ensuring it is level with the surrounding wood. Let the filler dry completely before sanding it smooth with 80 sandpaper. If the damage is more extensive, you may need to replace the entire board, beam, joist, or other affected structural element.
Assessing the Extent of Wood Rot Damage
Assessing the extent of wood rot damage is crucial for homeowners looking to make home improvements. One method to determine the level of damage is by using a wooden stick and a claw hammer to inspect the affected areas. If the wood is soft and easily penetrated by the stick, the fungus has likely caused significant rot. Wearing latex gloves is optional but can protect against any harmful spores. Once the damage has been identified, homeowners may consider remediation options to prevent further deterioration. Depending on the severity of the rot, a simple coat of paint may suffice, or more extensive repairs may be necessary. In some cases, home buyers may request a professional assessment before completing the purchase. Before making any repairs, contacting the insurance company to check if the damage is covered is essential. For more information on wood rot and repair techniques, check out the recent posts on our website or refer to the 3D menu for a step-by-step guide to completion.
Tools and Materials Needed for Wood Rot Repair
The right tools and materials are essential for a successful wood rot repair. Here are some commonly used items you’ll need:
Protective gear: Safety goggles, gloves, and a dust mask to protect yourself from dust, debris, and potentially harmful chemicals.
Circular or reciprocating saw: These tools help cut out and remove damaged wood.
Chisel and hammer: You’ll need these to clean the rotted wood and prepare the area for repair.
Epoxy wood filler: This material is ideal for filling in the voids left by the rotted wood.
Wood preservative: A wood preservative helps prevent future wood rot by inhibiting fungal growth and repelling insects.
Primer and paint: Once the repair is complete, applying a primer and paint will protect the wood and enhance its appearance.
Step-by-Step Guide to Repairing Wood Rot
Now that you have the necessary tools and materials let’s dive into the step-by-step process of repairing wood rot. Follow these instructions carefully for a successful repair:
Step 1: Safety First
Before starting any repair work, ensure you have the appropriate safety gear. Protect your eyes, hands, and respiratory system from dust and fumes.
Step 2: Remove the Rotted Wood
Carefully cut out the rotted wood using a circular or reciprocating saw. Make sure to remove all the damaged areas, creating clean edges.
Step 3: Clean the Area
Use a chisel and hammer to clean out any remaining rotted wood or debris from the area. Create a clean and smooth surface for the repair.
Step 4: Apply Epoxy Wood Filler
Mix the epoxy wood filler according to the manufacturer’s instructions. Fill the void left by the rotted wood with the filler, leveling it with the surrounding wood surface.
Step 5: Sand and Shape
Once the epoxy wood filler has dried, use sandpaper to smooth and shape the repaired area. Start with coarse-grit sandpaper and gradually move to finer grits for a seamless finish.
Step 6: Apply Wood Preservative
To protect the repaired wood from future rot, apply a wood preservative. Follow the instructions on the product label for the best results.
Step 7: Prime and Paint
Finish the repair by applying a primer and paint to the repaired area. This will provide an extra layer of protection and ensure a cohesive look.
Preventative Measures to Avoid Future Wood Rot
Preventive Measures to Avoid Future Wood Rot
Wood rot is a common problem affecting any wooden structure, from decks and fences to window frames and doorways. To prevent future wood rot, there are several preventative measures that you can take. One of the most important steps is to ensure that all wood surfaces are adequately sealed and protected from moisture. This can be done by applying a waterproof sealant or paint to the wood, which will help create a barrier against water and prevent rot.
In addition to sealing the wood, it is also essential to regularly match and maintain the sealant or paint to ensure it remains effective. This may involve touching up any areas that show signs of wear or damage and periodically editing the entire surface to ensure it is adequately protected.
Another preventative measure is regularly checking for any signs of water damage or rot. This can be done by inspecting the wood for soft or discolored spots and using a screwdriver to probe the wood for any signs of decay. By taking these preventative measures, you can help protect your wooden structures from future wood rot and ensure they remain in good condition for years. Prevention is always better than cure when it comes to wood rot. Here are some preventative measures you can take to avoid future wood rot:
- Control moisture: Regularly inspect your home for water leaks or excessive moisture. Address these issues promptly to prevent wood rot.
- Improve ventilation: Ensure proper airflow and ventilation in areas prone to high humidity, such as basements and crawl spaces.
- Seal and protect wood: Apply a sealant or wood preservative to exposed wood surfaces, especially those regularly exposed to moisture.
- Maintain gutters and downspouts: Keep your gutters and downspouts clean and free from debris to prevent water from seeping into the wood.
- Trim vegetation: Trim back tree branches and foliage that may be touching or near wooden structures, as they can promote moisture buildup.
Common Mistakes to Avoid During Wood Rot Repair
While repairing wood rot, it’s essential to avoid common mistakes that can compromise the durability and effectiveness of the repair. Here are some mistakes to steer clear of:
Incomplete removal of rotted wood: Ensure you remove all the damaged wood, even if it means cutting out a more extensive section. Leaving behind any rotted lumber can lead to further deterioration.
Insufficient preparation of the area: Thoroughly clean the area and create a smooth surface for the repair. Any remaining debris or unevenness can affect the adhesion and longevity of the repair.
Using the wrong type of filler: Make sure to use an epoxy-based wood filler specifically designed for wood rot repair. Regular wood putty or filler may not provide the necessary strength and durability.
Skipping the wood preservative: Applying a wood preservative is crucial in preventing future wood rot. Please don’t overlook this step; it can save you from future repairs.
Rushing the process: Take your time and follow each step carefully. Rushing can lead to mistakes and compromise the effectiveness of the repair.
Hiring a Professional for Complex Wood Rot Repair
While minor wood rot repairs can often be done as a DIY project, complex or extensive damage may require the expertise of a professional. If you’re unsure about the extent of the damage or don’t have the necessary skills, it’s best to consult a professional contractor or carpenter. Professionals have the experience and knowledge to assess the situation accurately and provide the most appropriate repair solutions. They also have access to specialized tools and materials, ensuring a high-quality, long-lasting repair.
DIY vs. Professional Wood Rot Repair: Pros and Cons
Choosing between a DIY wood rot repair and hiring a professional depends on various factors. Here are some pros and cons to consider:
DIY Wood Rot Repair
Pros: – Cost-effective, especially for minor repairs – Provides a sense of accomplishment and control – Allows customization and personalization.
Cons: – Requires time, effort, and skill – May not be suitable for complex or extensive damage – Lack of professional expertise and tools
Professional Wood Rot Repair
Pros: – Expert assessment and accurate repair solutions – Access to specialized tools and materials – Saves time and effort – Guarantees high-quality and long-lasting repairs.
Cons: – Higher cost, especially for extensive repairs – Less control over the process and customization
Final Thoughts On This: Maintaining the Integrity of Your Wood Structures
Wood rot can be a frustrating and damaging problem, but with the proper knowledge and techniques, you can effectively repair and prevent it. Understanding the causes and signs of wood rot, assessing the damage, and using the appropriate tools and materials are essential to successful repairs. You can avoid future wood rot issues by taking preventative measures to control moisture, improve ventilation, and protect your wood. However, if you’re unsure about the extent of the damage or lack the necessary skills, it’s best to consult a professional for complex wood rot repairs.
Remember, maintaining the integrity of your wood structures is essential for your home’s safety, longevity, and beauty. With proper care and timely repairs, you can enjoy the warmth and elegance of wood while ensuring its durability for years to come.